The Google Home app is your one-stop shop for everything smart home-related. Whether you want to check the brightness and color of your smart lights, start your robot vacuum, view the feed on your Nest cameras, or even easily connect new Matter smart home appliances, Google Home can do it all.
Google Home works on any Android or iOS device, although it sports the most features on Android devices because of the deep integration with Google’s operating system. In fact, the Pixel Tablet will give you the best smart home control experience thanks to its exclusive home control panel, designed to function similarly to a Nest Hub smart display.
The Google Home app even works on the best Android smartwatches, giving you quick smart home control right from your wrist. You could always use Google Assistant to get things done, and many Google Assistant functions and settings are controllable via the Google Home app. Ready to learn more? Let’s check it out.
How to setup Google Home
The Google Home app is free to download and use on Android’s Google Play Store and the iOS Apple App Store. You will need a valid Google account in order to use it, though, so be sure to have that ready to sign into the app.
Controlling your smart home through Google Home is simple, but first, you’ll need to set up the app and name your home. When you start the app for the first time, you’ll want to enable notifications via the on-screen prompts. Once you select the Google account you want to use for the app, you’ll be able to allow nearby devices permission and location access.
Nearby devices permission is optional but it gives the Google Home app the ability to scan for and add new nearby smart home devices, making setup just a button click or two. Gone are the days when you’d need to download a dozen different apps for every smart gome product manufacturer!
Location access is also optional and, when enabled, will allow the Google Home app to automatically set your smart home devices to “home” or “away” modes, which can come in handy for automatically turning the lights on or off, setting the thermostat to eco mode, and enabling other power-saving automations.
Once you’ve accepted all the permissions you’re comfortable with, the Google Home app will ask you to name your home for organizational purposes. Each “home” within the app can have its own set of rooms or spaces, allowing you to conveniently organize smart home devices into the physical rooms they’re in. That way, if you ask Google Assistant to “turn on the kitchen lights,” Google Home will understand this command and only turn on the lights in the “kitchen” room within the app.
Setting up new devices in Google Home
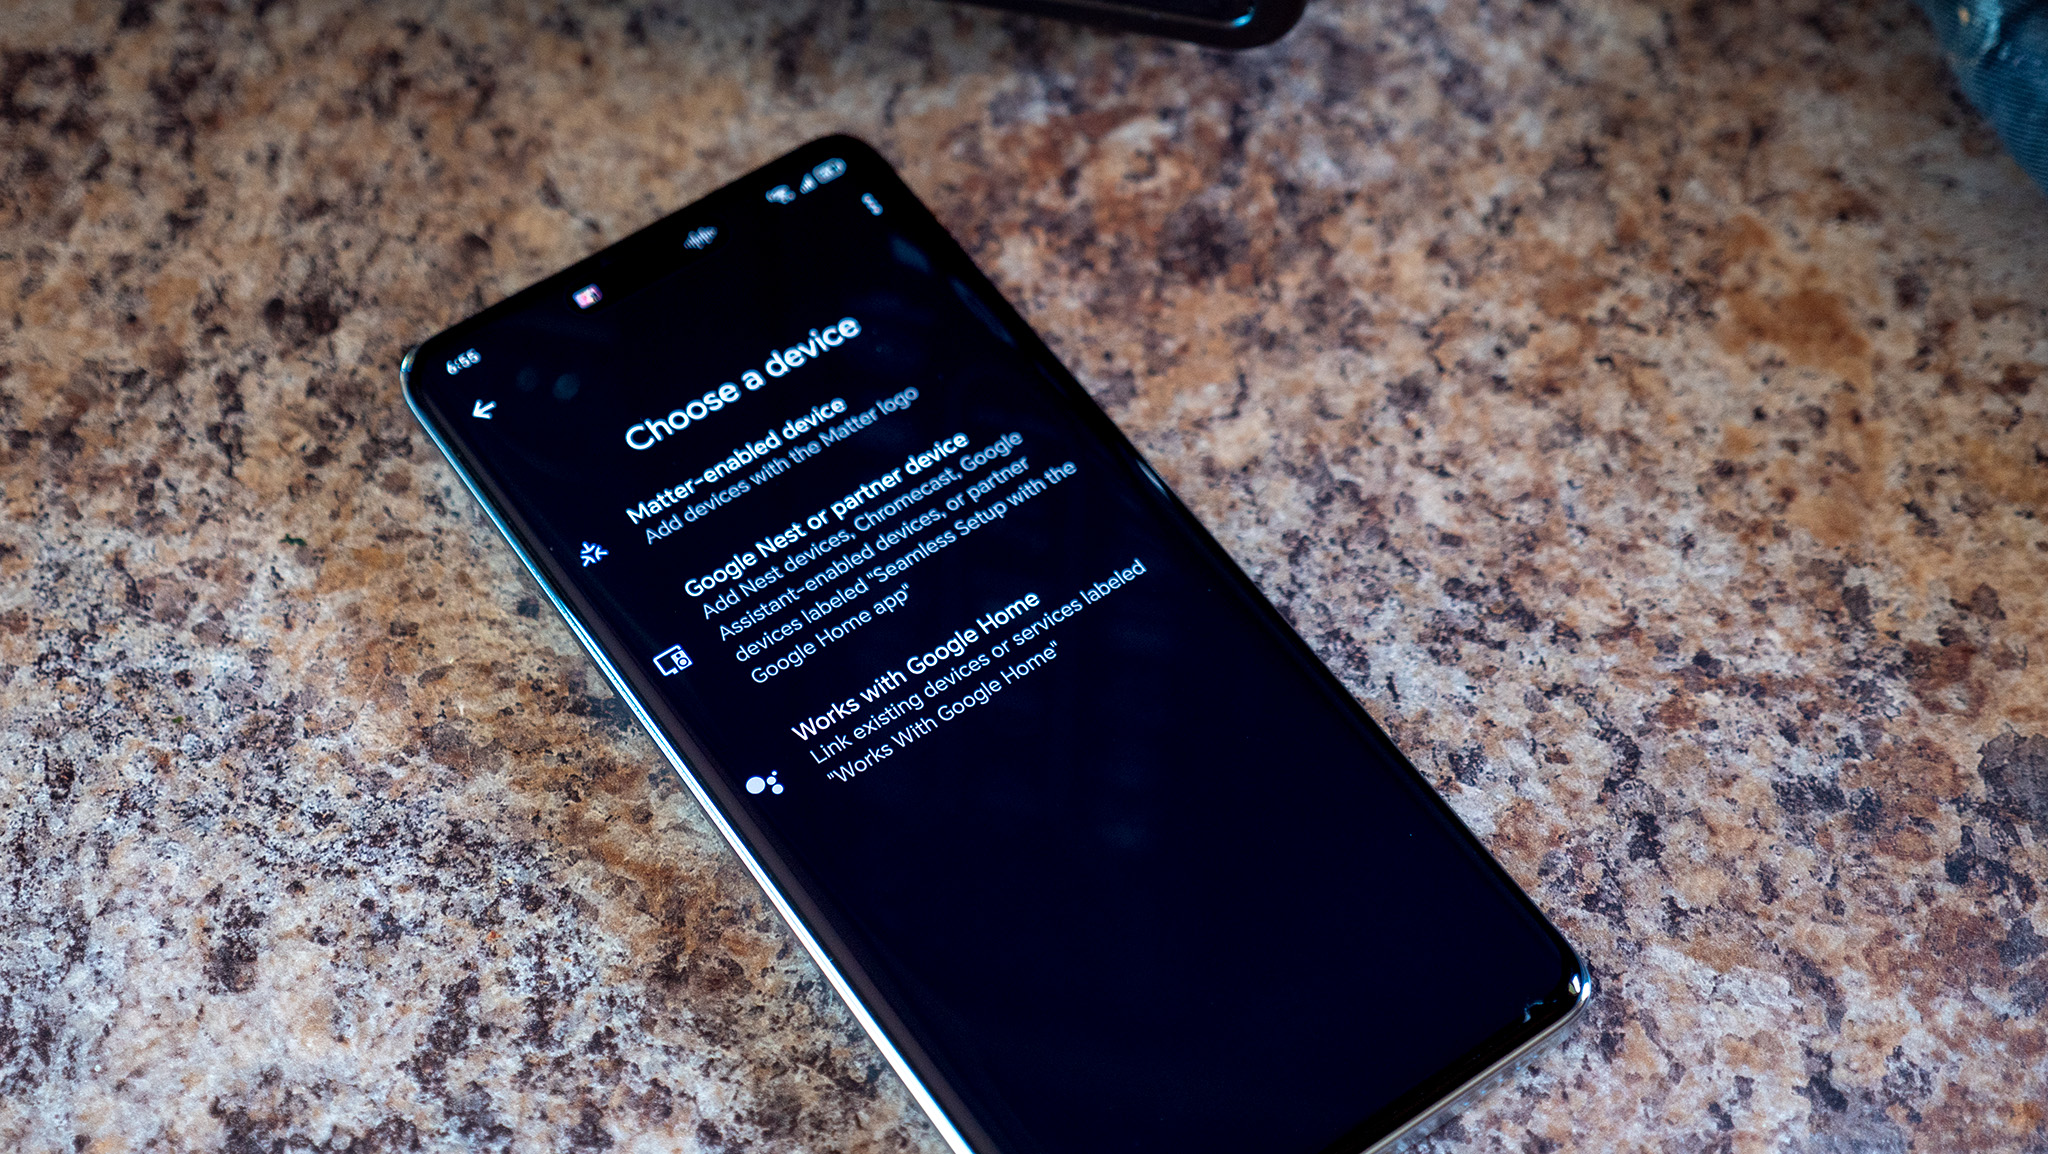
If you’re starting from scratch or just got one of the best smart home devices, you’ll want to set it up in the Google Home app. The best part about Google Home is that it can incorporate nearly any smart home gadget you have, even if it’s already set up in another app.
Better yet, Matter-supported devices can be 100% set up in the Google Home app without needing to download the manufacturer’s own app. In most cases, powering on a Matter-supported device for the first time will bring up a notification on your phone to set it up through the Google Home app. This is the easiest and quickest method with all newer smart home devices.
If you’re running older smart home devices — or ones without Matter support — it’s still pretty easy to set up in the Google Home app. Note that you may have to download the smart home device manufacturer’s app first.
To add a new device, navigate to the devices tab at the bottom of the Google Home app, then tap the blue add button on the bottom right. From here, select the category of device that best fits the one you’re trying to set up. Matter devices require the least number of steps.
Using the works with Google Home category will require you to select a manufacturer’s service before continuing. Most smart home devices are supported in Google Home, so all you’ll need to do is follow the steps to log in to your account for that device’s manufacturer and link it with your Google account.
Once you select a device category, choose your home and the room the device will be organized in. The on-screen instructions will guide you through any additional setup that might be required.
Controlling your smart home with Google Home
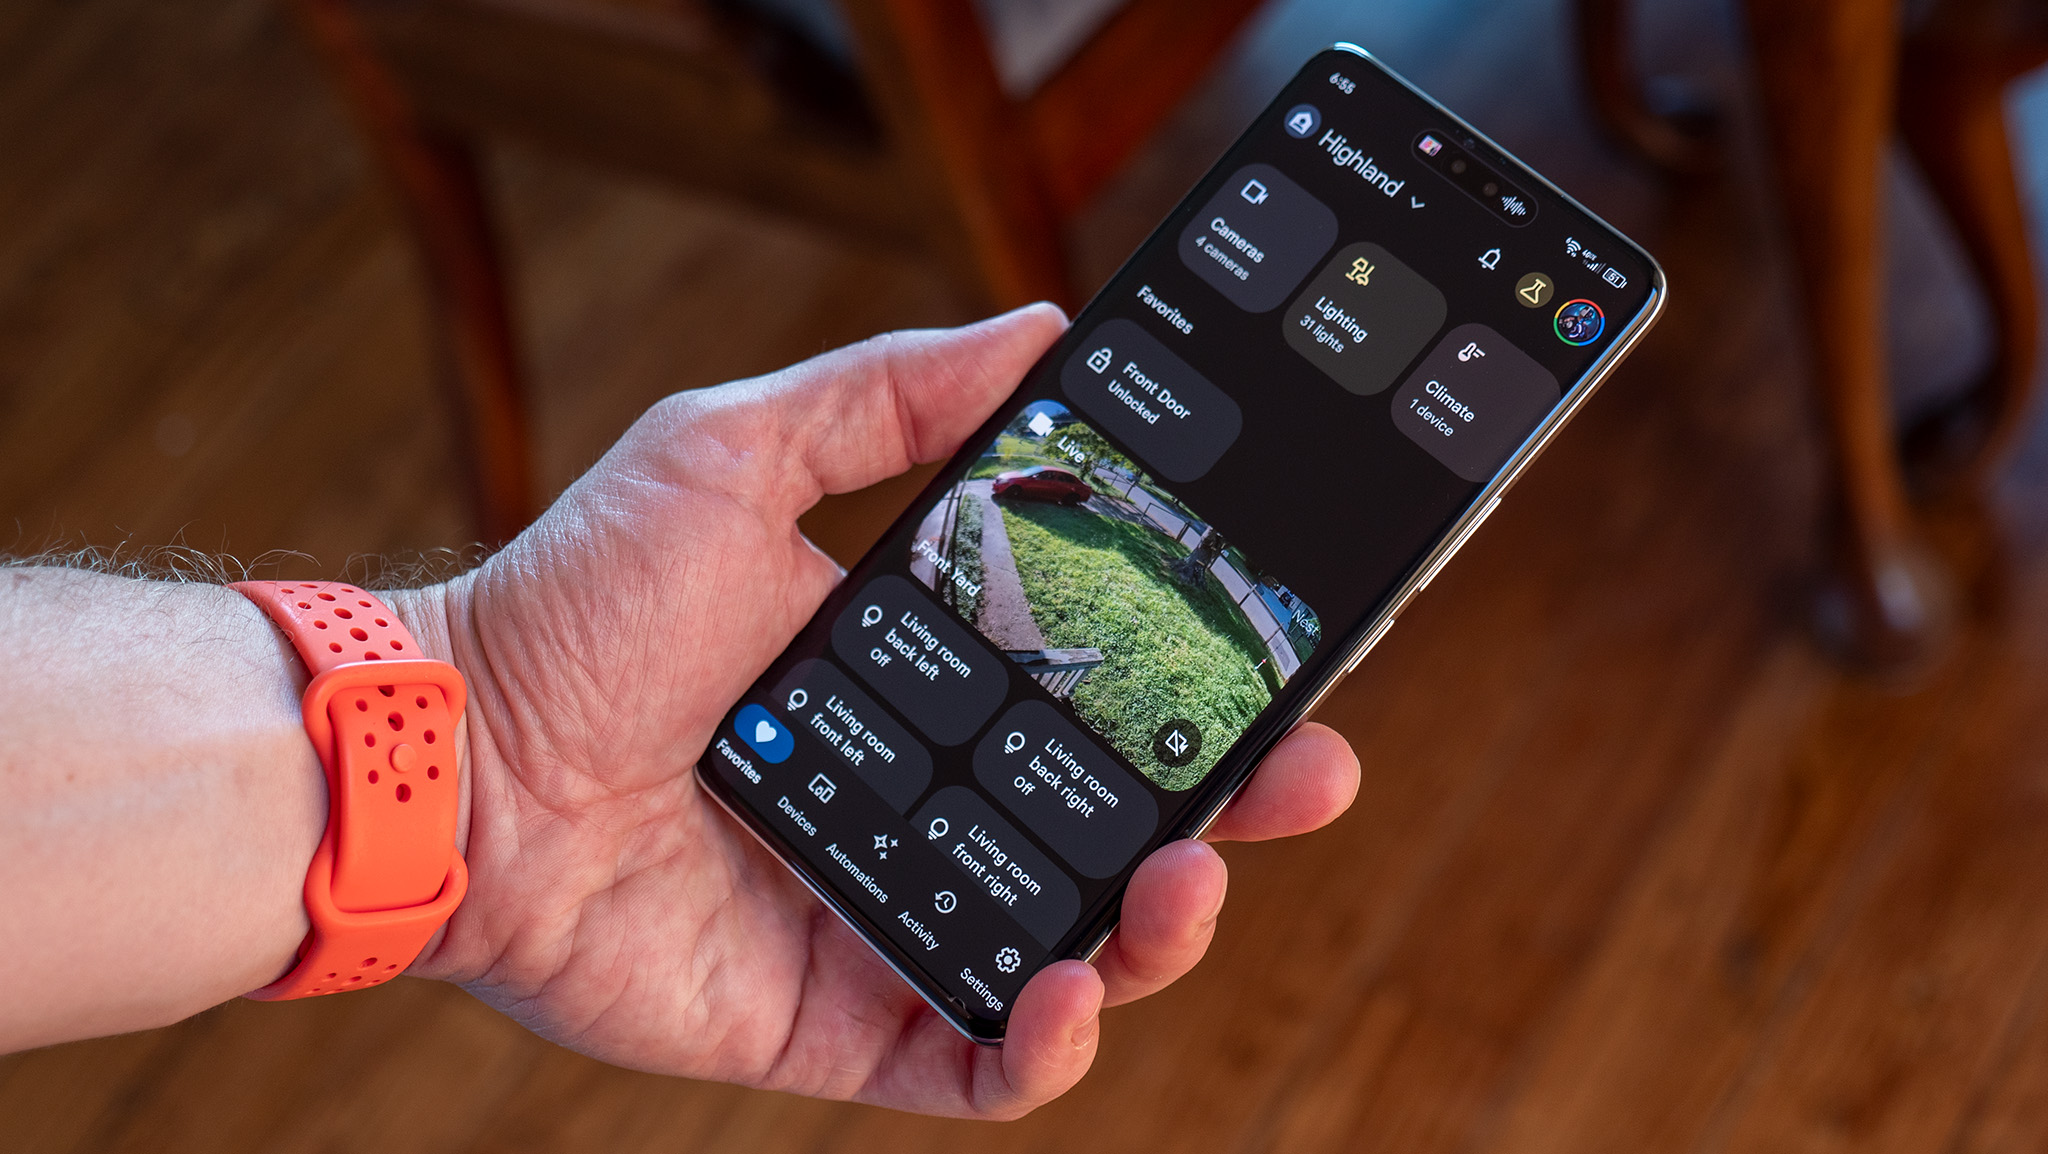
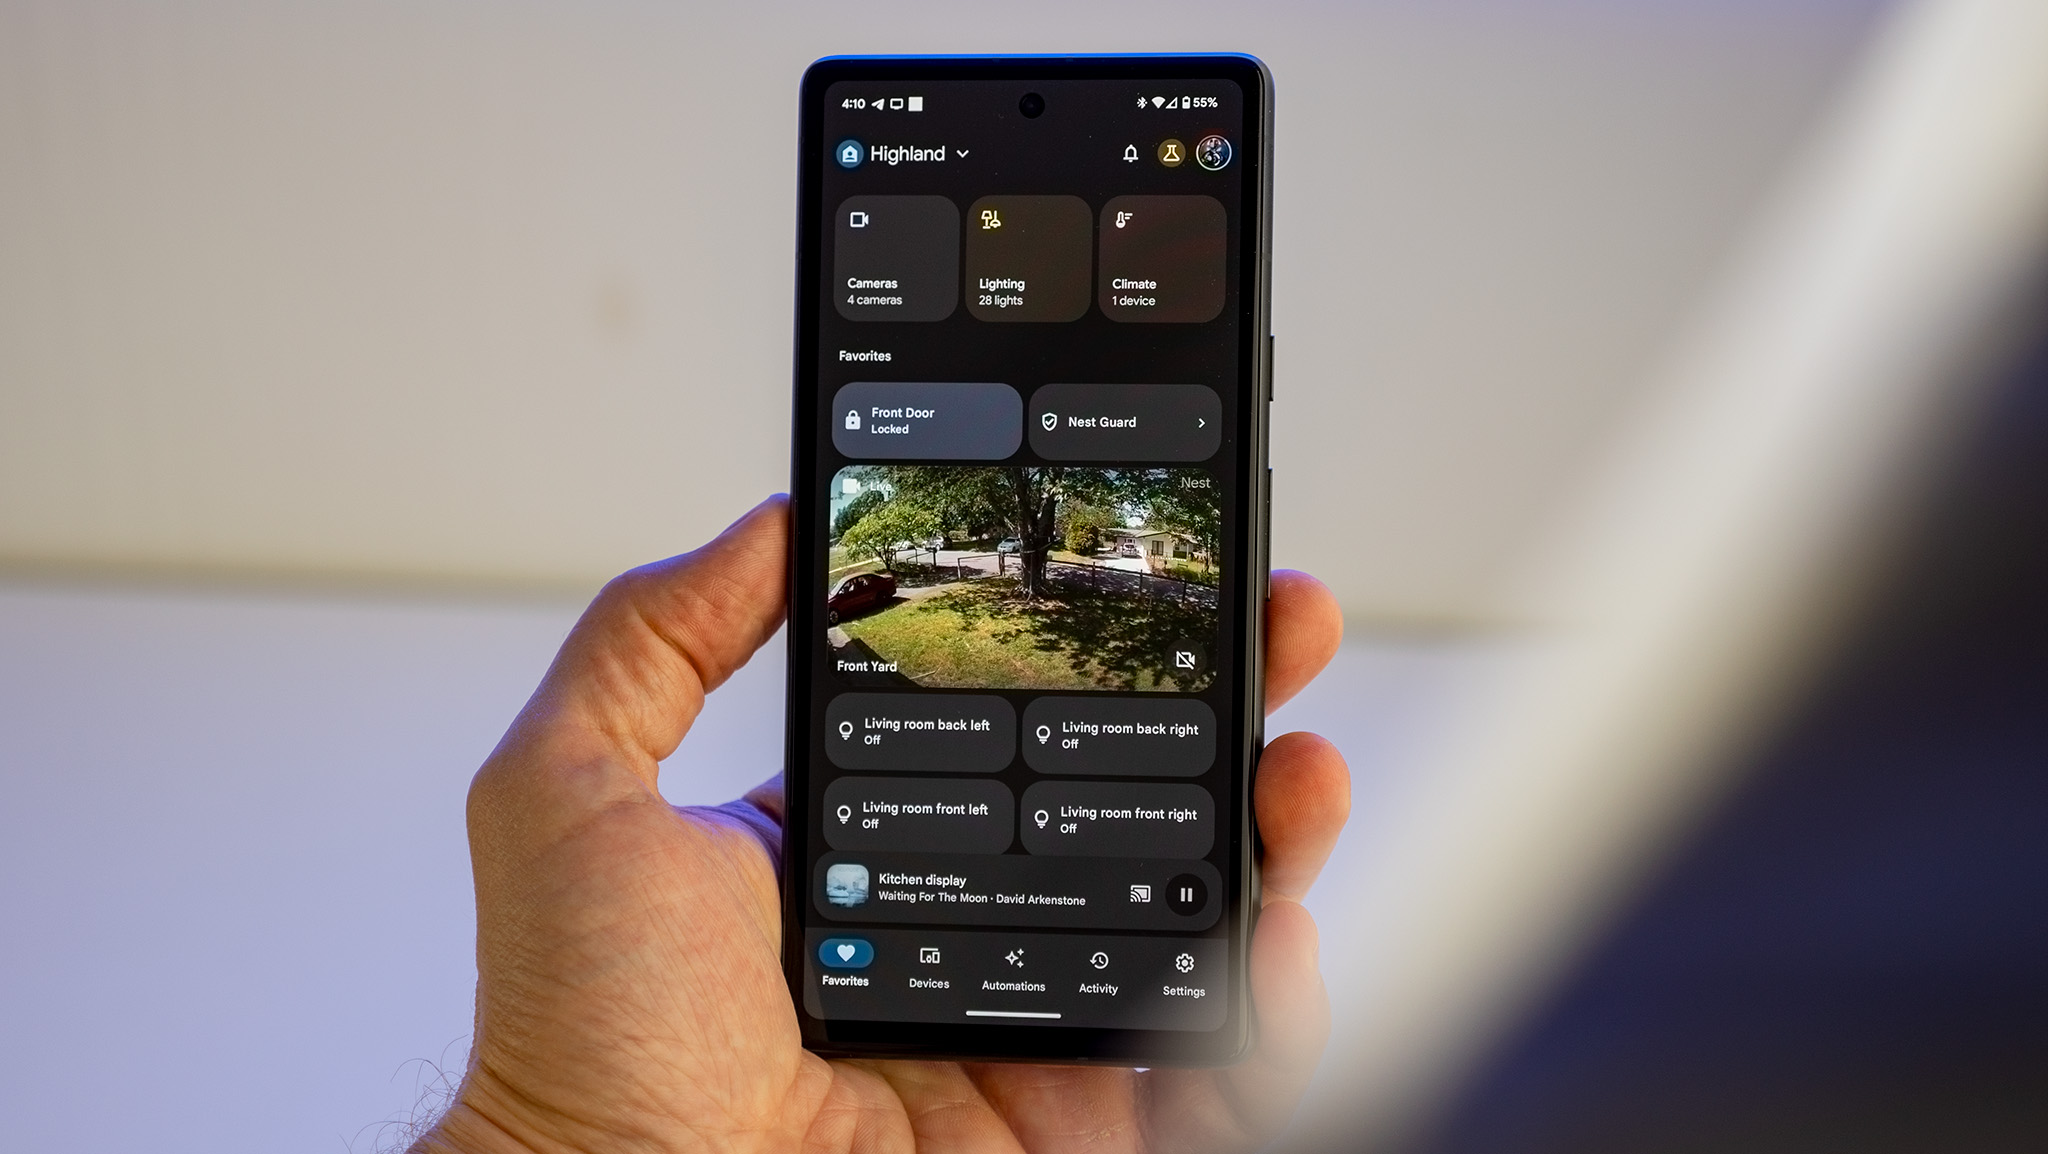
The Google Home app’s main tab is the Favorites tab, which displays all your pinned smart home gadgets in a customizable grid. Items in this tab can be added or removed by scrolling to the bottom and tapping the edit button. Any item in the list that has a checkmark next to it will automatically appear in the Favorites tab.
Likewise, tapping the reorder button at the bottom of the favorites tab lets you move around each gadget’s tile. I keep my most-used gadgets at the top of the list — my front door lock, living room lights, front yard camera, and thermostat — while other important, but less often used, gadgets are ordered further down the list.
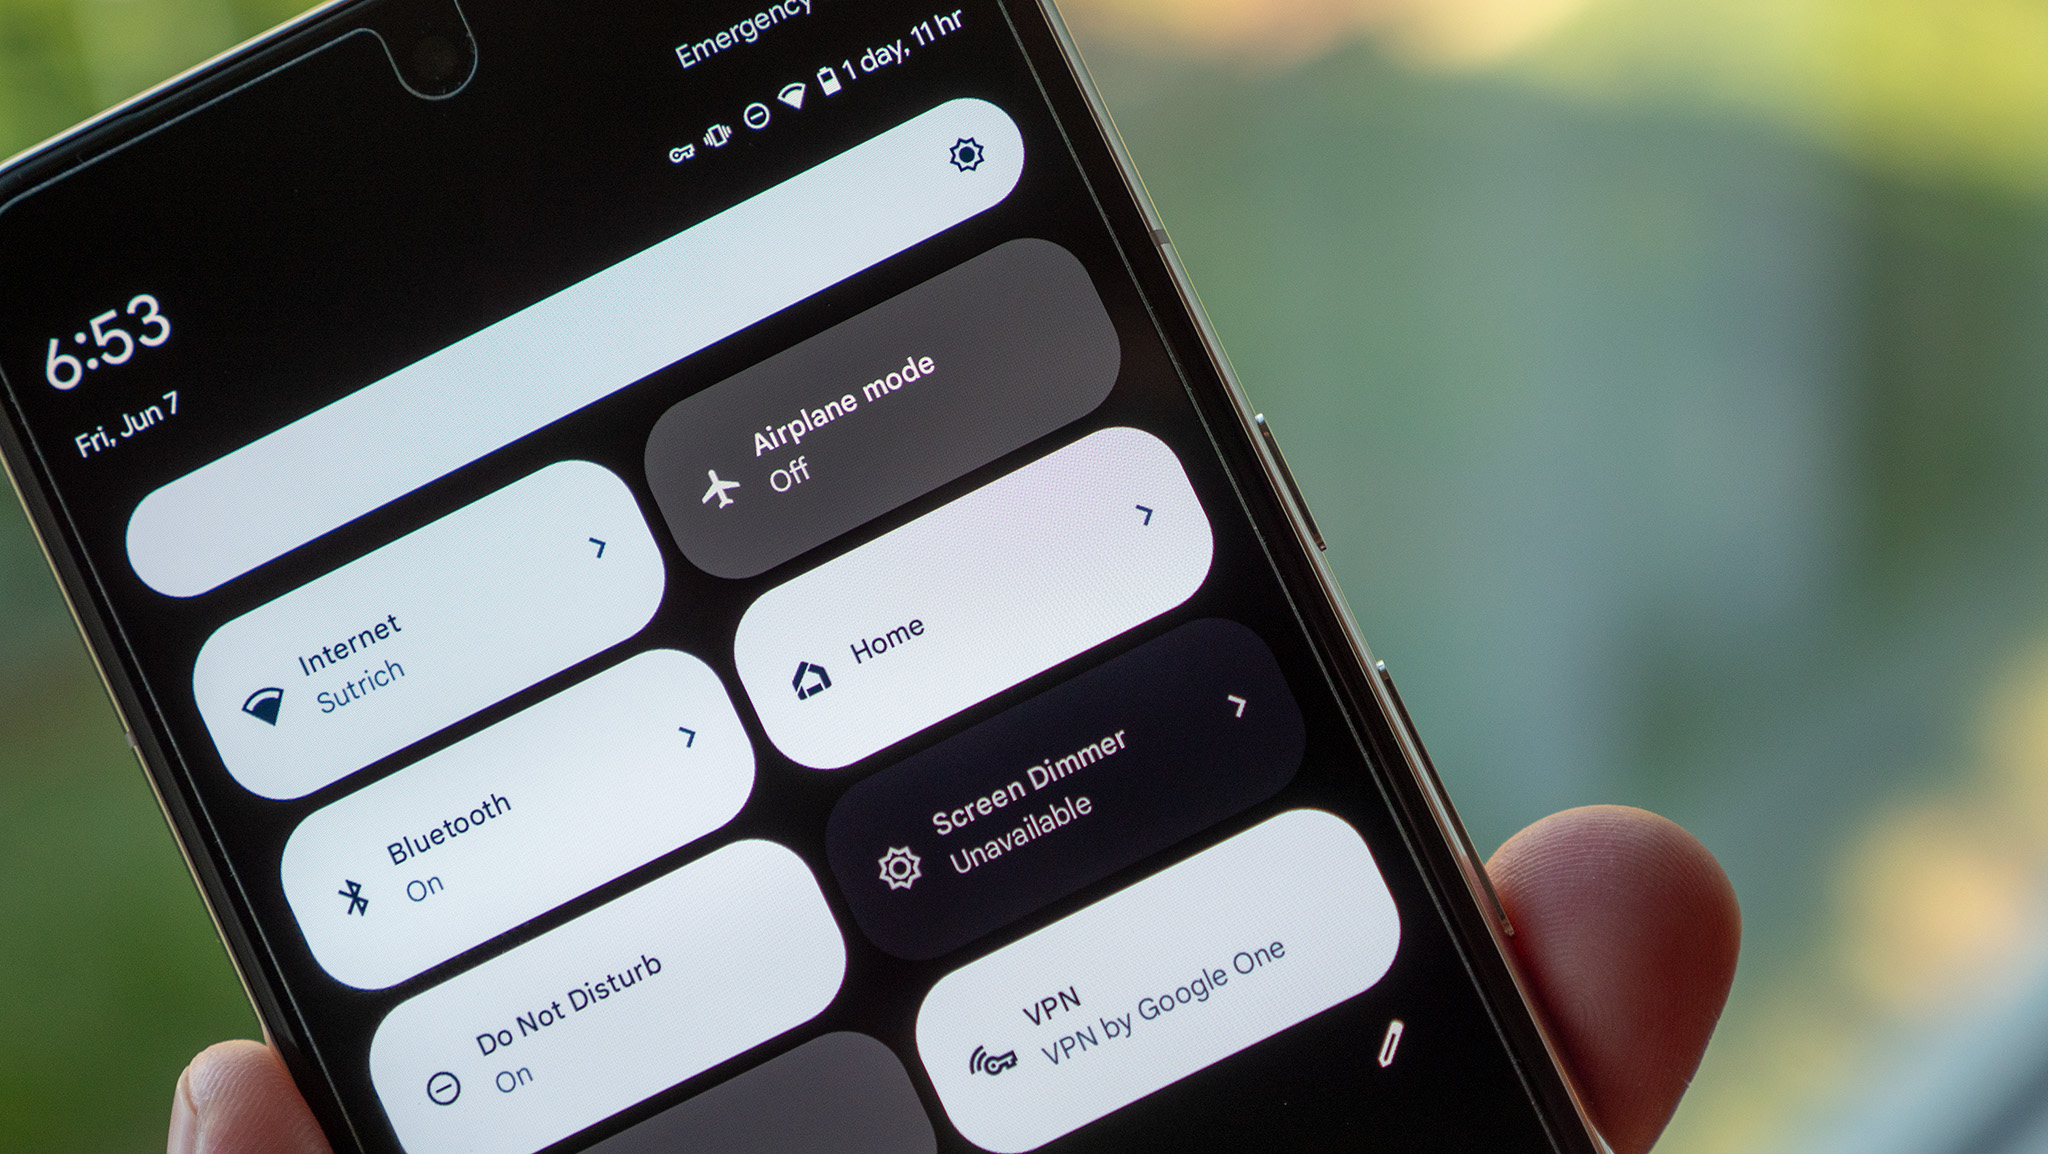
Many Android phones support using this device control pane, as it’s often called, right from the quick settings menu. To find this, pull down on the status at the top of your phone and find the device control button. On Google Pixel, Samsung Galaxy, and OnePlus phones, this is often in the top row of quick settings buttons.
Some phones, like Samsung Galaxy phones, may require you to choose Google Home as your smart home control service first. Normally, this is done by opening the aforementioned device control panel, then tapping the overflow menu on the top right, followed by tapping edit or another similar option. Samsung often uses Samsung SmartThings as the default service, so you’ll need to change this to Google Home in order to use it.
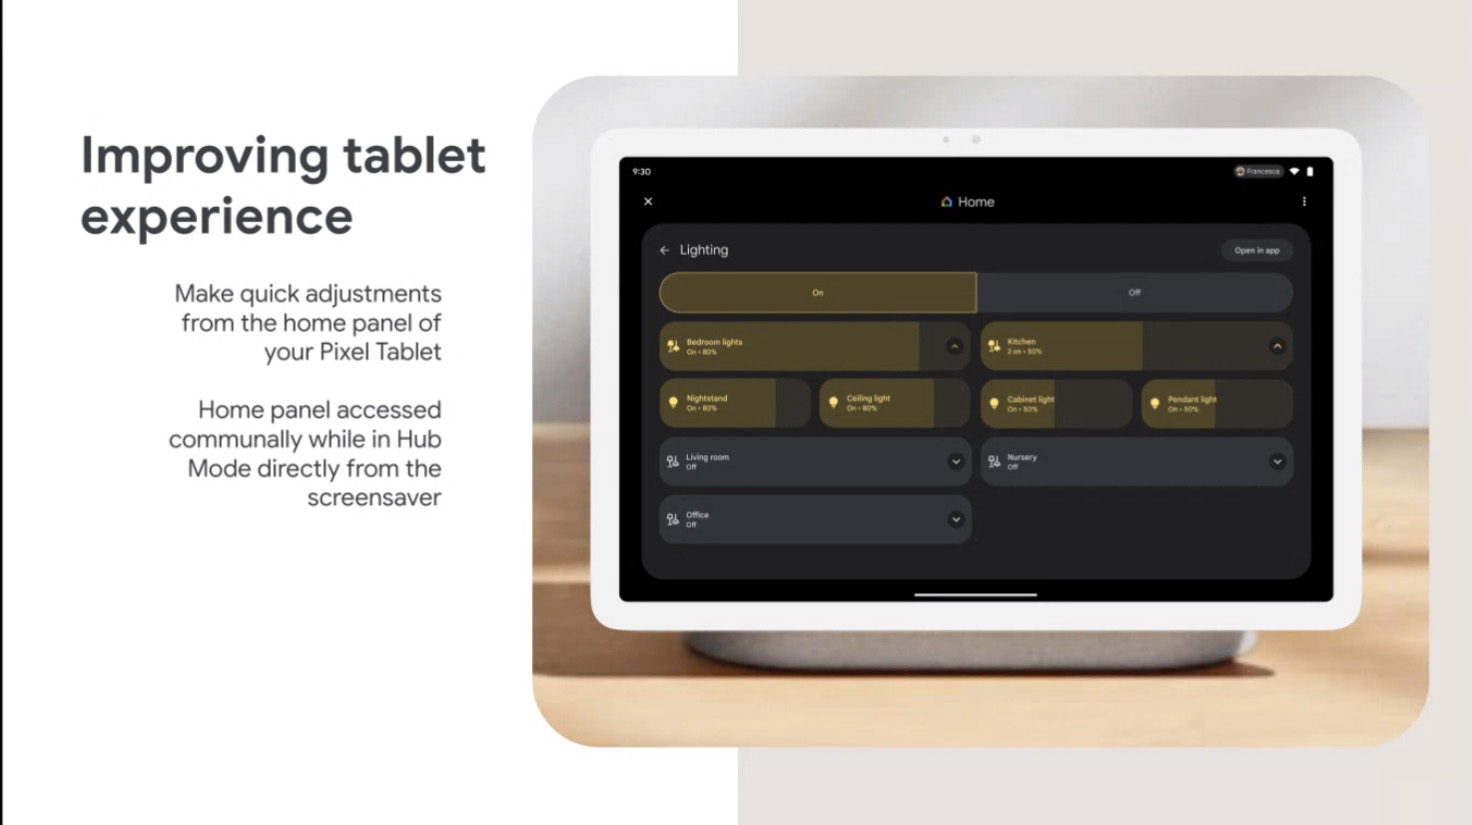
Any light can be turned on or off by tapping the tile. You can also adjust the brightness of each light by sliding your finger left and right on the tile, so long as the light in question supports brightness adjustment. Long-pressing on a light tile will give you more options, like changing the color of supported lights.
Similarly, tapping the tile of a smart lock will lock or unlock it, while smart plugs will turn on and off when tapped. Long-pressing any tile will give you more options for that gadget. Some tiles, like camera feeds, may even display advanced timeline and event options if supported.
The best wireless smart home security cameras, like Nest Cam (battery), have the option to quickly turn the camera on and off right on the video tile. A tap on the tile itself will bring up the camera UI which shows the last handful of recorded events and may even display PTZ controls on supported cameras.
If you’re looking to control all your devices — or just one that’s not on the favorites tab — tap that devices tab at the bottom to see all your smart home devices organized by room. The same control UI from the favorites tab applies here, so tapping on a tile will perform a quick on/off action, sliding on lights will adjust brightness, and long-pressing will bring up more options for that device.
Getting things automated
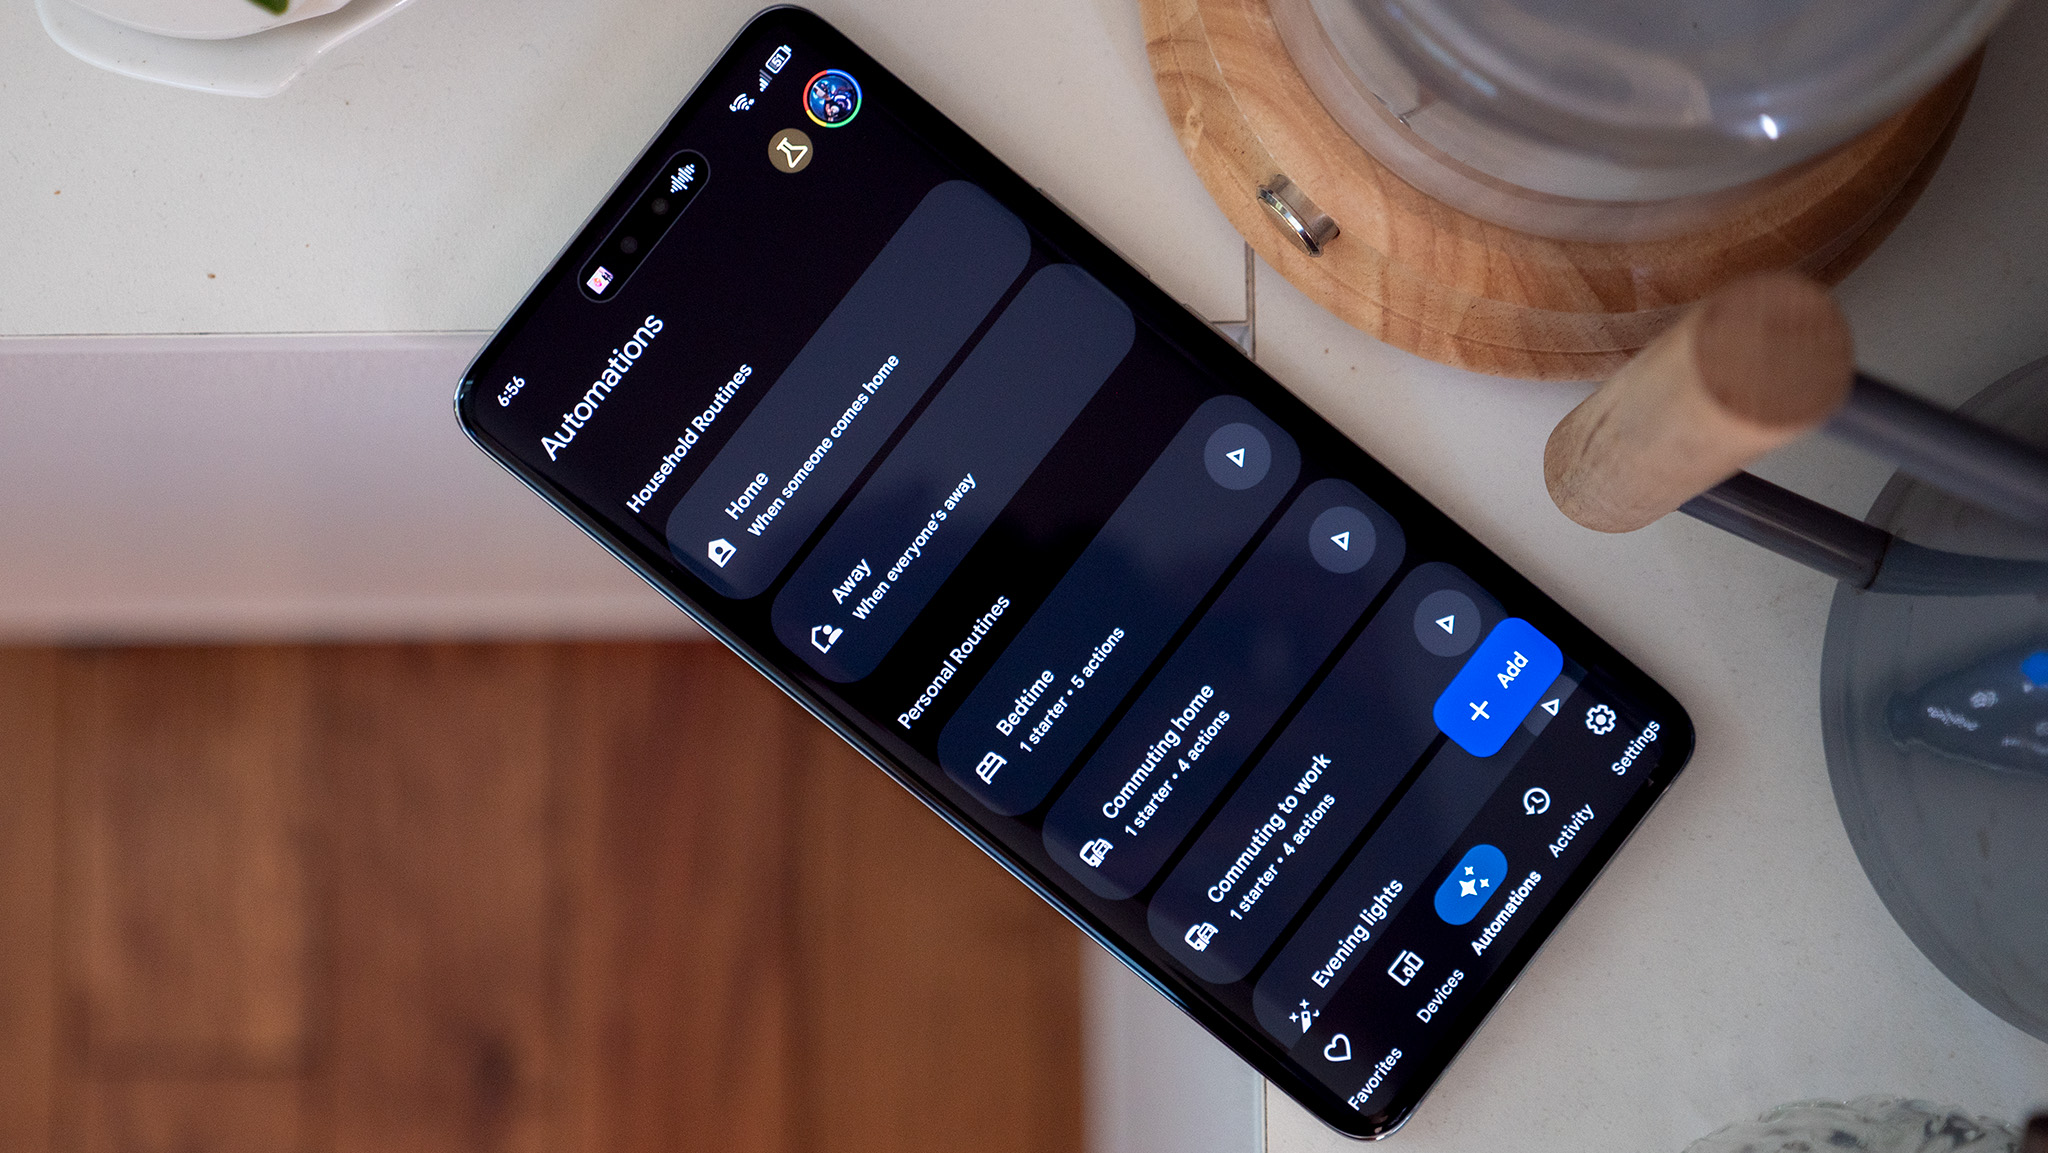
Google has substantially overhauled the automations function in recent years, providing an easy way for your smart home devices to control themselves. Whether that means turning lights on and off with a timer, changing your thermostat when you leave home, or locking the door at bedtime is all up to you.
One of the coolest functions of the Google Home app is the quick home and away modes function, which lets you group common actions together based on whether you’re at home or away from home.
To get started with this, navigate to the automations tab, then tap either Home or Away to start setting up devices for location-based automation. Google offers suggested starters in each category which will help you quickly decide what options make the most sense. For instance, turning off your indoor cameras, setting the thermostat to a comfortable level, and playing music could all occur when you pull into your driveway.
Likewise, you may want to enable camera recording, turn on the porch light, and set the thermostat to eco mode when you leave the house. Once you’re done selecting your desired actions, tap the blue save button on the bottom right to save either the Home or Away function actions.
Back in the main automations tab, tapping that blue add button will let you configure other automations that can occur based on the time of day, if you want to give Google Assistant a specific command, or even by using other smart home devices as a trigger. For instance, ringing your favorite video doorbell can trigger anything from lights turning on, video recording, or even music playing to greet the person at your door.
Some devices, like lights, are nice to turn on and off based on sunrise or sunset. Tapping that add button, and then selecting sunrise or sunset as the starter action will enable this.
Otherwise, maybe you’d prefer to start a routine when you go to bed or when it’s time for your kids to take a bath. Selecting when I say to Google Assistant as the starter action lets you use any custom command to start a routine, so “bed time” or “bath time” can trigger any number of devices in your home to do something you want to encourage better sleep or quicker bedtime routines.
👇Follow more 👇
👉 bdphone.com
👉 ultraactivation.com
👉 trainingreferral.com
👉 shaplafood.com
👉 bangladeshi.help
👉 www.forexdhaka.com
👉 uncommunication.com
👉 ultra-sim.com
👉 forexdhaka.com
👉 ultrafxfund.com
👉 ultractivation.com
👉 bdphoneonline.com